I had been looking for an Raspberry Pi project for a long time, the various media player and game emulators didn’t interest me enough besides I wanted something that the whole family could get involved in. It was only through discussing this at work that someone mentioned they had built a Hedgehog camera with a Raspberry Pi. Awesome! That was exactly the project I was looking for.
So over the course of several nights I built a prototype and was genuinely surprised at a) how much fun I had putting it together, b) that it actually worked and finally c) how much the whole family has got involved.
One thing I found pretty much straight away was although there is plenty of information on the web to build one of these devices it is not all in one place and I found myself going from one site to another so this post is my attempt to bring all the information and what I learnt whilst building it into one place. I will of course acknowledge which sites helped.
Before going any further here is what my device looks like.
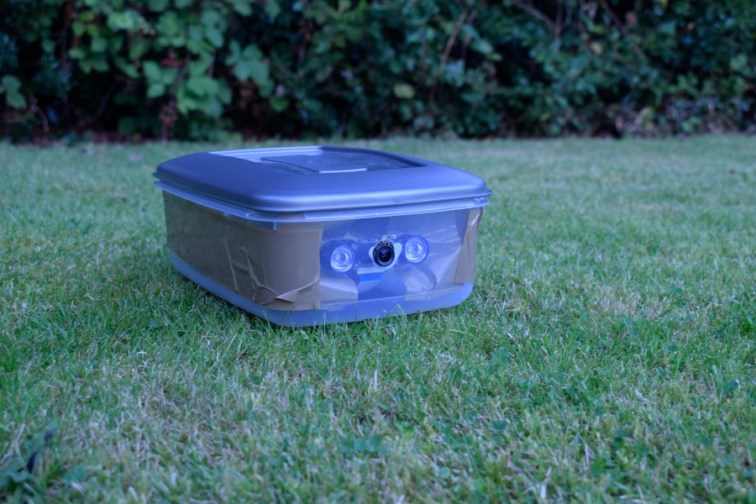
Granted, it won’t win any design awards. You can spend more time making it look far more aesthetically pleasing if you so wish.
Setting up the Raspberry Pi
If you are using an existing Raspberry PI and its software is up to date , then you can skip this step. Out of the box my Raspberry PI required various updates. Using the advice from here I ran
sudo apt-get update
to update the package list followed by
sudo apt-get dist-upgrade
to upgrade all packages to their latest version.
If you are going to use the default user, Pi remember to change the password!
Fitting the camera and installing the camera software
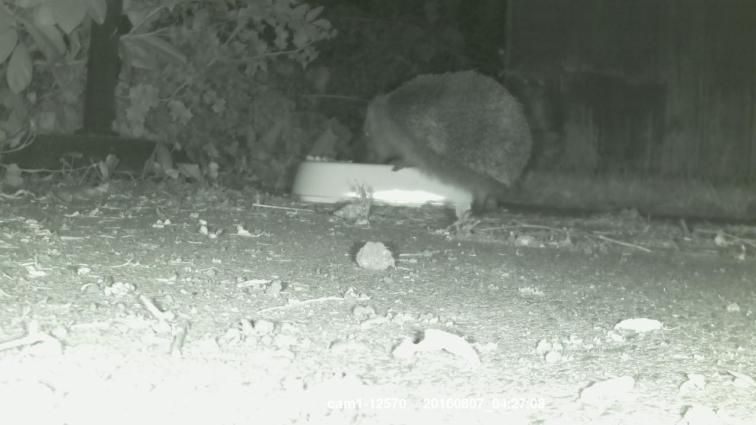
It is important to note that the Waveshare camera is an all in one device. By which I mean it comes with everything needed to take pictures at night time. You don’t need extra infra red led’s or motion sensors. I should also point out that the camera takes stills and not videos. What you can do using the software that I mention below is to “stitch” all the pictures taken in one night together to create a time lapse MP4 file that you can watch, upload to YouTube etc.
First you need to fit the camera to the Raspberry Pi. This video is an excellent tutorial, even though the camera module in the video is different, the installation is exactly the same.
With the camera now fitted you need to install software to control the camera and when pictures are taken. I chose pi-timolo. This excellent piece of software can be configured to take photo’s whenever motion is detected. The installation is straight forward and as my Raspberry Pi is only being used for the Hedgehog camera I also followed the instructions to run on boot. Which, in case of need means that when the Raspberry Pi starts up, the camera starts capturing images once it detects motion.
The default location for the photos are:
/home/<<username>>/pi-timolo/motion
where <<username>> is the name of the user that installed pi-timolo.
At this point, we now have a Raspberry Pi camera that will take a photograph whenever it detects motion which means that the number of photographs taken every night will be measured in the hundreds. Sifting through these every day will very quickly lose it’s appeal (if it ever had one) so the final software package we are going to install is FFmpeg. This will “stitch” all the photographs for a day (or folder) into one MP4 file. Playing the MP4 file will give you a time lapse like experience. You can download FFmpeg from here. I will show you how to use FFmpeg in the Reviewing the Results section.
Fitting the PI and camera into the air tight container
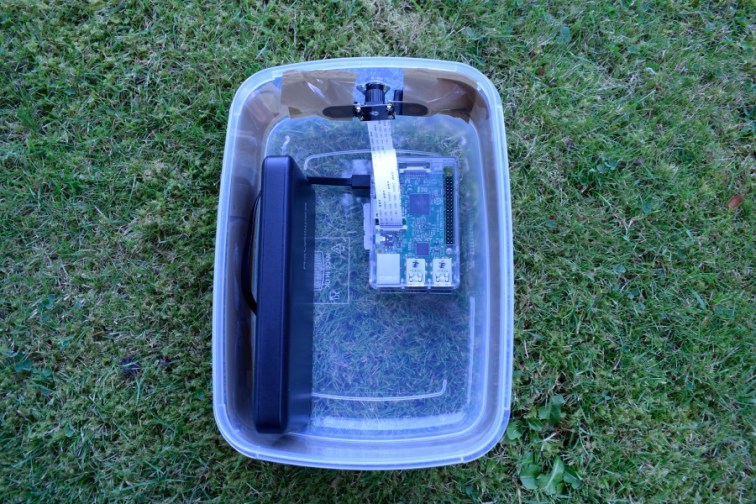
Firstly make a guide in the middle of the airtight container. This should be at one end of container. Then using the drill bit I have suggested or another tool drillcut a circle so that the camera can be fitted. You do not need to cut similar holes for the infra red sensors. Then fix the camera to the inside of the container. I have used parcel tape(!) to secure mine. Not elegant but it works.
If you have not done so, now is the time to connect the camera to the Raspberry Pi.
The final step is to connect the battery to the Raspberry Pi, I normally do this just before I place the container in the garden.
The parcel tape around the outside of the box is to cut down the amount of light that is visible from within the box.
Where to place in the garden
The obvious answer is to place the camera in the area where you have seen Hedgehogs or their poo! However the key is to experiment so try various places around your garden.
Reviewing the Results
After collecting the container the following morning, my workflow for reviewing the results is to first power down the Raspberry Pi (it is still using the battery at this point) and then connect it to the mains and restart it.
After navigating to
/home/<<username>>/pi-timolo/motion
I copy the photos to another folder within my home directory called
/home/<<username>>/garden/<<date_of_photos>>
and using the following FFmpeg command
ffmpeg -f image2 -pattern_type glob -i '*.jpg' 20160821.mp4
which creates an MP4 file from all the jpg files within the directory where this command was run.
After a few minutes the process will be complete and you will be able to play the MP4 file using your favourite player. When viewing on the Raspberry Pi I use Omxplayer or other devices I use VLC.
Optional Extras
One optional extra that springs to mind is to add a WiFi extender dongle (if your garden is large enough) this will enable you to connect to the device and see what is happening in real time.
If you think of other optional extras please let me know via the comments.
Summary
In this article I have gone through the steps required to create a Hedgehog camera using a Raspberry Pi.
This write up has been made a couple of weeks after I had built my own version, so if I have missed something or I haven’t made a particular point clear enough please let me know in the comments.
Acknowledgements
My gratitude for a large part of this work, in particular the genius of using the air tight container goes to http://www.sconemad.com/blog/hedgeycam/
