One use of an EventEmitter in Angular.io is for a child component to tell it’s parent something of interest has happened or to put it another way; they can be used to allow data to flow out of your component.
Below is a diagram of the application which I am going to be using in this post. It shows the parent (App-Root) and the child (App-Child) components. This post will build an application so that when something (in this case a button press) occurs in the child component the parent component should know about it.

When learning about EventEmitters I found it useful to understand the component hierarchy because without it I found it easy to become disorientated and end up not knowing what component needed to emit the event and which one needed to handle it.
Create a brand new application. If you get stuck or want to look at the completed example, it is up on GitHub.
ng new eventemitter-intro
Create a new component. I am using the short cut of g c (generate component) and spec = false to omit the testing file.
ng g c child --spec=false
The final step in setting up the application is to delete all the content from the app.component.html file and replace it with:
<app-child></app-child>
At this point your new Angular App should reflect the diagram with a parent component; app-root and a child; app-child and in Visual Studio Code looks like this:

Navigate to the child.component.html and add the following:
<p>
  <button>This button</button>
</p>
<p>
  <button>That button</button>
</p>
Run your application using:
ng serve --open
You should see something similar to:

Now back to the child.component.html and add click events to the buttons:
<p>
  <button (click)="onButtonClicked()">This button</button>
</p>
<p>
  <button (click)="onButtonClicked()">That button</button>
</p>
The click events are being bound to functions that have not been written yet so that will be the next step. Navigate to child.component.ts and change it so it now looks like this:
import { Component, OnInit, Output, EventEmitter } from '@angular/core';

@Component({  selector: 'app-child',
              templateUrl: './child.component.html',
              styleUrls:   ['./child.component.css']})

export class ChildComponent implements OnInit {
  @Output() whichButton = new EventEmitter<void>();

  constructor() { }
  ngOnInit() {  }

  onButtonClicked() {
    this.whichButton.emit();
  }
}
The first change is:
@Output() whichButton = new EventEmitter<void>();
This line creates a new EventEmitter property called whichButton and is decorated with @Output(). To use the @Output decorator and the EventEmitter they are added to the import statement at the top of the file.
Next is the method that the click event on both of the buttons use. It invokes the emit method of the whichButton property.
At this point the child component now has been set up to emit an event each time one of it’s buttons is pressed. Now it’s on to the parent component to write the handler for this event.
Navigate to app.component.html and replace:
<app-child></app-child>
with
<app-child (whichButton)="whichButtonPressed()"></app-child>
<p>
    {{ buttonPressed }}
</p>
So whenever there is a “whichButton” event emitted by app-child it will be handled by the whichButtonPressed method.
whichButton is the name of the EventEmitter property from the child component and whichButtonPressed() is the name of a method that will handle the event. This method hasn’t been written yet but will be in the next step. String interpolation will be used to display the name of the button that has been pressed.
Navigate to app.component.ts and add the following:
import { Component } from '@angular/core';

@Component({  selector: 'app-root',
              templateUrl: './app.component.html',
              styleUrls: ['./app.component.css']})

export class AppComponent {
  buttonPressed: string;

  whichButtonPressed() {
    this.buttonPressed =  (<HTMLButtonElement>event.currentTarget).innerText;

  }
}
What is interesting here is that the code can access the event object without needing to pass it in as a parameter. If you want to find out more about the $event take a look at the Angular docs.
buttonPressed is a property that the string interpolation on
app.component.html will use to display which button has been pressed. This property is set by the method whenButtonPressed().
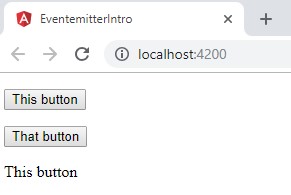
Here is the finished application showing the buttons that are on the child component and the result of pressing one of them being handled by the parent component.